Automatic Sliding Door Installation Checklist: 10 Critical Steps Every Installer Should Complete Before Commissioning
Automatic sliding doors have become a standard feature in commercial buildings, healthcare facilities, retail centres, offices, and public-access environments across Australia. While modern operators are more reliable than ever, many performance issues can still be traced back to installation errors rather than equipment faults.
Problems such as door drag, uneven movement, sensor malfunctions, excessive noise, and premature component wear often originate during installation and commissioning. Even high-quality automatic door systems can experience reduced performance if alignment, safety devices, or controller settings are not configured correctly.
Following a structured automatic sliding door installation checklist helps installers minimise callbacks, improve safety compliance, and ensure reliable operation from day one. Whether you’re fitting a new commercial entrance or replacing an existing operator, a systematic approach can significantly improve long-term outcomes for both installers and end users.
This guide walks through the most important installation and commissioning steps every professional should complete before handing over an automatic sliding door system. A comprehensive automatic sliding door installation checklist helps installers reduce callbacks, improve compliance, and deliver more reliable automatic door systems.
Why Proper Installation Matters More Than Most Installers Realise
Installing an automatic door involves far more than mounting an operator and connecting power. Every component affects the overall performance of the system.
The Cost Of Small Installation Errors
Minor mistakes can quickly develop into major operational issues. A header installed slightly out of level may cause uneven door travel. Poor sensor positioning can create nuisance activations or safety risks. Loose fixings can generate vibration and excessive noise during operation.
These issues often lead to costly service calls, dissatisfied clients, and avoidable warranty claims.
Installation Impacts Long-Term Performance
The lifespan of an automatic sliding door depends heavily on how accurately it is installed.
Poor alignment increases friction on rollers and drive components. Excessive resistance forces motors to work harder, placing additional stress on belts, bearings, and electronic controls. Over time, this can reduce reliability and increase maintenance requirements.
A properly installed system operates smoothly, quietly, and efficiently throughout its service life.
Compliance Responsibilities For Installers
Installers play a critical role in ensuring automatic doors meet applicable safety requirements. This includes conducting risk assessments, installing approved safety devices, verifying correct operation, and maintaining appropriate documentation.
Compliance is not simply a product feature, it is the result of correct installation, testing, and commissioning procedures.
Automatic Sliding Door Installation Checklist Before Unloading Equipment
Before any equipment is unpacked, installers should confirm the site is ready for installation.
For projects requiring documented compliance, installers should also review the EN 16005 automatic door safety standard, which outlines key safety requirements for power-operated pedestrian doors.
Confirm Structural Suitability
The mounting structure must be capable of supporting the operator and door assembly without movement or deformation.
Check:
- Wall integrity
- Structural fixing points
- Mounting surface condition
- Potential load-bearing limitations
If structural concerns exist, these should be resolved before installation begins.
Conducting a formal site assessment in line with Safe Work Australia risk assessment guidance can help identify hazards before installation starts and reduce potential safety issues during commissioning.
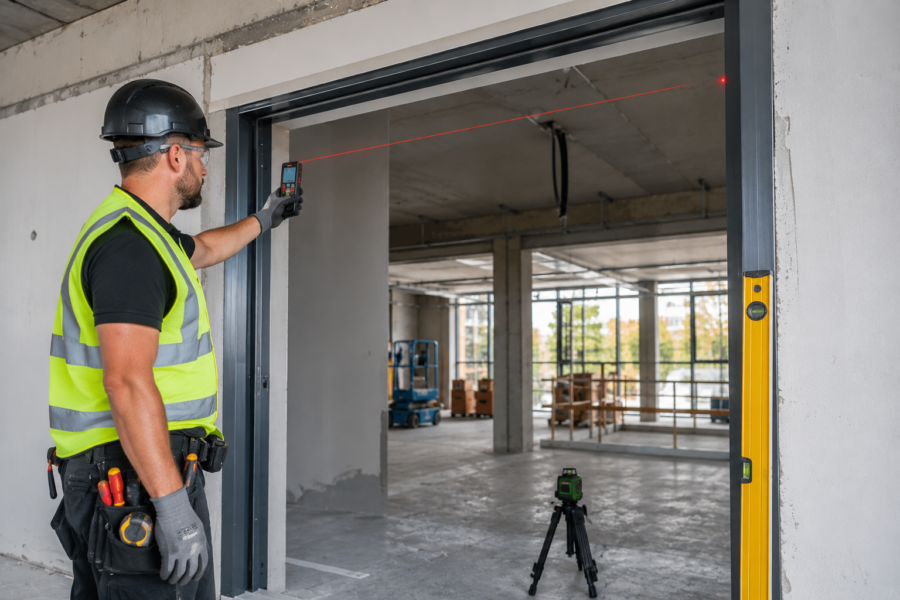
Verify Opening Dimensions
Measure all critical dimensions and compare them with project specifications.
Confirm:
- Opening width
- Opening height
- Headroom clearance
- Side clearances
- Finished floor levels
Even small discrepancies can affect alignment and performance later in the project.
Review Traffic Requirements
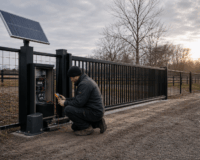
Different environments place different demands on automatic doors. High-traffic facilities such as hospitals, airports, and shopping centres often require specialised commercial sliding door operators designed for continuous operation and demanding duty cycles.
Consider factors such as:
-
- Pedestrian traffic volume
- Accessibility requirements
- Peak operating periods
- Security requirements
- Emergency egress needs
Accessibility requirements should also be reviewed against current Australian Building Codes Board accessibility requirements to ensure the entrance meets relevant building and access standards.
Understanding the intended use helps determine the most appropriate operating parameters during commissioning. Accessibility requirements should also be reviewed against current guidance from the Australian Building Codes Board to ensure safe and inclusive access for all users.
Step 1 – Inspect The Opening And Surrounding Structure
A thorough site inspection helps identify potential issues before installation starts. Every automatic sliding door installation checklist should begin with a detailed inspection of the opening and surrounding structure.
Check Wall Straightness
Automatic sliding door operators require a straight and level mounting surface.
Uneven walls can create alignment problems that affect door travel, increase friction, and accelerate wear. Where necessary, installers should use suitable shims or mounting plates to create a level installation surface.
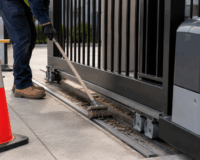
Verify Floor Levels
Floor conditions directly influence door performance.
Inspect for:
-
-
- Uneven floor surfaces
- Improper floor guide positioning
- Potential trip hazards
- Drainage or settlement issues
-
A level floor helps maintain smooth movement and consistent clearances throughout the door’s travel.
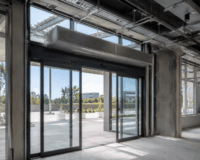
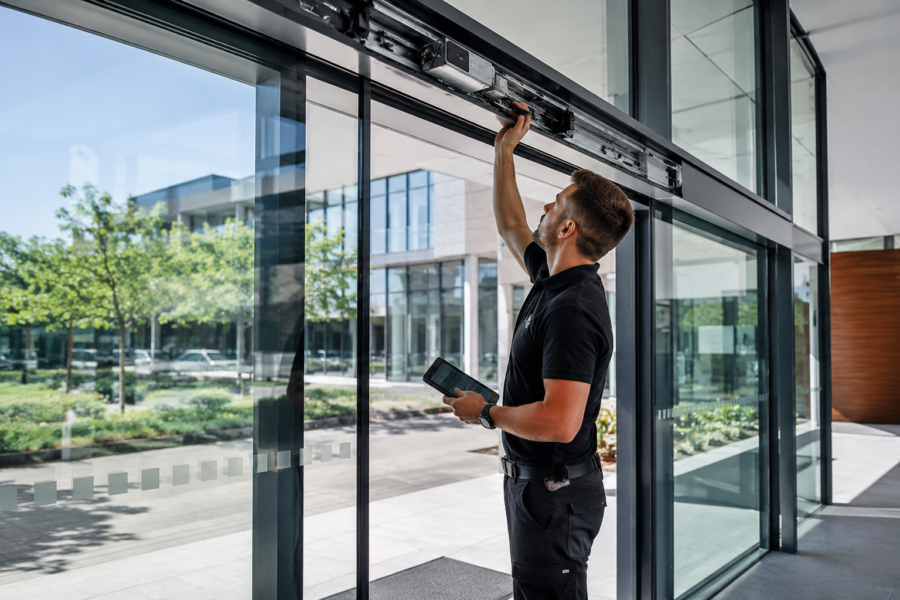
Step 2 – Install And Level The Header Assembly Correctly
The header assembly forms the foundation of the entire automation system. Following an automatic sliding door installation checklist during header installation helps prevent alignment issues later in the project.
Mounting Requirements
Secure mounting is essential for long-term reliability.
Installers should:
-
-
- Use appropriate fixing hardware
- Follow recommended fixing intervals
- Distribute loads evenly
- Verify structural anchoring points
-
A rigid and properly supported header reduces vibration and improves operational stability.
Common Header Installation Mistakes
Several common mistakes can affect performance:
-
-
- Twisted mounting profiles
- Sagging headers
- Incorrect fasteners
- Insufficient fixing points
- Poor levelling practices
-
Taking extra time during this stage can prevent significant issues during commissioning.
Step 3 – Align Door Leaves And Carriages
Correct door alignment is one of the most important stages in the automatic sliding door installation checklist. Door alignment is one of the most critical stages in any automatic sliding door installation checklist.
Door Leaf Adjustment
Door leaves should be adjusted to achieve:
-
-
- Consistent vertical alignment
- Correct horizontal positioning
- Uniform clearances
- Smooth engagement with guides
-
Misalignment can cause rubbing, vibration, and increased drive resistance.
Check For Free Movement
Before powering the system, manually move the door through its full travel range.
Verify that:
-
-
- Movement is smooth
- No binding occurs
- Rollers operate correctly
- Floor guides remain aligned
- Mechanical stops are correctly positioned
-
Any resistance identified at this stage should be corrected before commissioning.

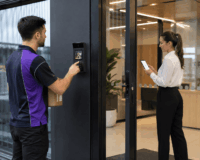
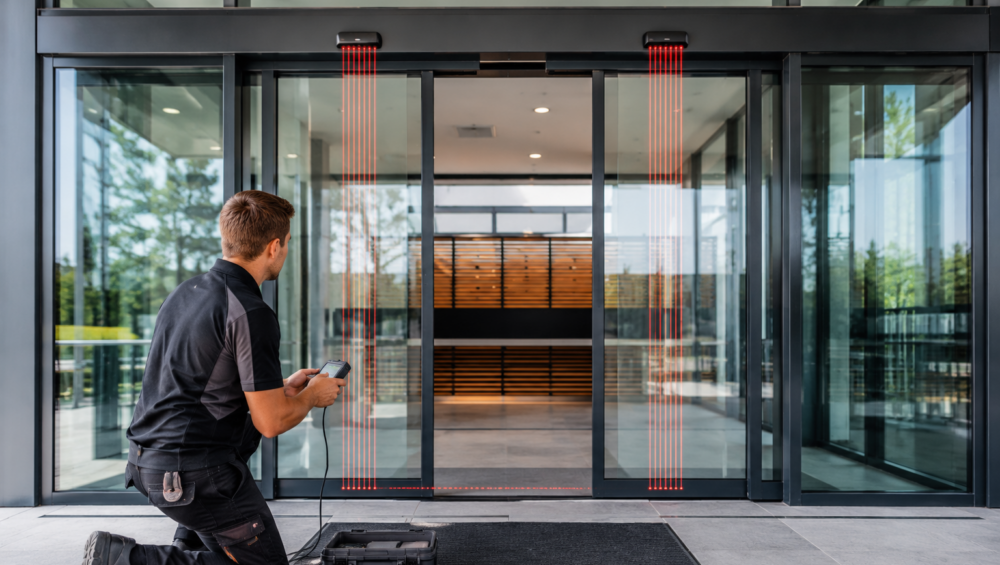
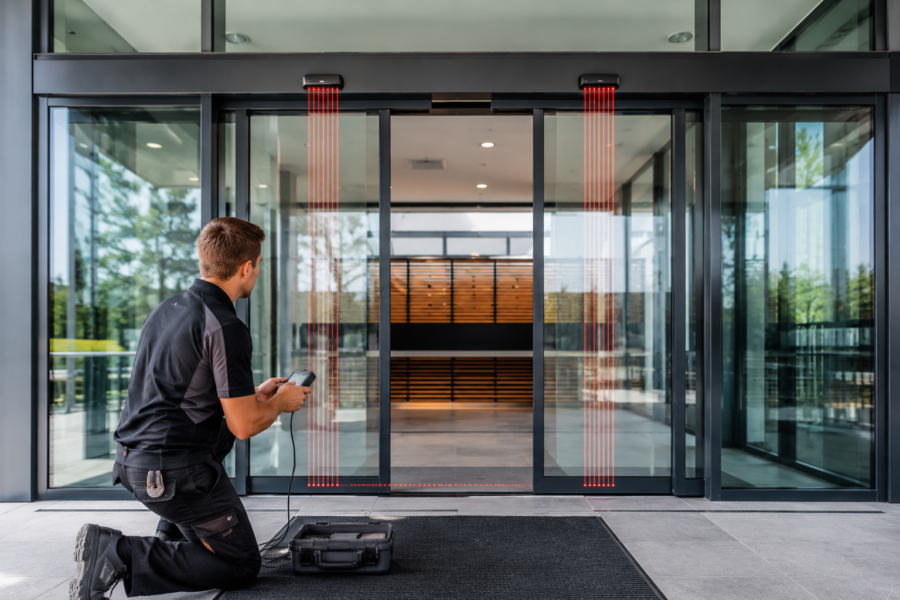
Step 4 – Install Safety Sensors Correctly
Safety devices are essential components of every modern automatic door system. Safety device verification is a mandatory component of an automatic sliding door installation checklist.
Activation Sensors
Activation sensors detect approaching users and trigger door opening.
Coverage zones should be carefully adjusted to provide reliable detection without creating unnecessary activations.
Presence Sensors
Presence sensors protect users while passing through the doorway.
Their role is to detect stationary or slow-moving pedestrians and prevent unsafe door movement.
Correct positioning and calibration are critical to achieving reliable operation.
Side Safety Sensors
Side-area sensors help protect against hazards associated with moving door leaves.
These devices reduce the risk of contact between pedestrians and moving panels, particularly in high-traffic environments where users may stand close to the door path.
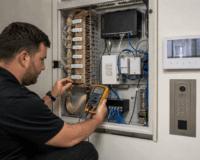
Step 5 – Electrical Connections And Cable Management
Electrical work should always follow applicable standards and manufacturer recommendations. Electrical inspections should always form part of an automatic sliding door installation checklist.
Power Supply Requirements
Before energising the system, verify:
-
-
- Correct supply voltage
- Suitable circuit protection
- Proper earthing
- Stable power quality
-
Power issues can create intermittent faults that are difficult to diagnose later.
Cable Routing Best Practices
Good cable management improves both reliability and serviceability.
Installers should:
-
-
- Separate power and signal cables where practical
- Protect cables from damage
- Allow sufficient service loops
- Maintain clear access for future maintenance
-
Well-organised wiring simplifies future troubleshooting and upgrades.
Step 6 – Configure Controller Parameters
Modern operators provide extensive programming options that should be tailored to the application. Programming parameters should be reviewed against the automatic sliding door installation checklist before commissioning begins.
Opening Speed
Opening speed should balance user convenience with safe operation.
High-traffic sites may require different settings from healthcare facilities or aged-care environments.
Closing Speed
Closing speeds should provide efficient operation while maintaining safety and comfort for users.
Excessive closing speed can increase wear and create negative user experiences.
Hold Open Time
Hold-open periods should reflect traffic patterns.
Short durations improve energy efficiency, while longer periods may benefit facilities with high pedestrian flow.
Partial Opening Modes
Many installations benefit from programmable partial opening functions.
These modes can:
-
-
- Improve energy efficiency
- Reduce HVAC losses
- Improve environmental control
- Support access management strategies
-
Step 7 – Complete Commissioning Tests
No automatic sliding door installation checklist is complete without thorough commissioning. The final automatic sliding door installation checklist should include a complete commissioning and safety validation process.
Safety Sensor Validation
Test all safety sensors across their entire detection zones.
Confirm consistent operation from multiple approach angles and walking speeds.
Obstacle Detection Testing
Verify the door responds appropriately when encountering an obstruction.
The system should detect resistance and react according to programmed safety parameters.
Emergency Operation Testing
Emergency operation procedures should be tested before handover.
Verify the door behaves correctly under emergency scenarios and complies with site requirements.
Battery Backup Verification
Where battery backup systems are installed, simulate a power failure and confirm correct operation.
Battery-supported operation can be critical in healthcare, commercial, and public-access environments.
The Most Common Installation Mistakes That Cause Callbacks
Many service callouts originate from avoidable installation issues.
Poor levelling remains one of the most common causes of operational problems. Even small alignment errors can increase friction and create inconsistent door movement.
Incorrect sensor positioning is another frequent issue. Detection zones that are too narrow, too wide, or poorly aligned often lead to nuisance activations or reduced safety performance.
Installers also encounter problems caused by excessive belt tension, loose mechanical stops, inadequate cable management, or incomplete commissioning procedures.
Perhaps the most overlooked mistake is failing to thoroughly test safety functions before handover. A comprehensive commissioning process remains one of the most effective ways to reduce future support requests.
Creating A Maintenance Handover Package For Clients
Installation is only part of the project’s lifecycle. Proper handover helps clients maintain reliable operation long after commissioning.
What Documentation To Provide
A professional handover package should include:
-
-
- User operating instructions
- Safety information
- Maintenance recommendations
- Warranty documentation
- Service contact details
- Asset records
-
Providing clear documentation helps clients understand how the system should be operated and maintained. You may also wish to provide clients with a preventative maintenance plan based on best practices outlined in our guide on how to maintain automatic sliding doors.
Why Proper Handover Reduces Future Support Calls
When end users understand how the system works, they are less likely to report normal operating behaviour as faults.
Good documentation also encourages preventative maintenance, helping identify issues before they become costly repairs.
For installers, automatic sliding door installation checklist often translates into fewer reactive callouts and stronger long-term customer relationships.
Final Thoughts On Using An Automatic Sliding Door Installation Checklist
A professional automatic sliding door installation checklist provides a structured process for delivering safer, more reliable, and longer-lasting automatic door systems.
From initial site inspection and structural verification through to sensor calibration and final commissioning, every stage contributes to overall system performance. Small installation errors can lead to ongoing maintenance issues, unnecessary callbacks, and reduced customer satisfaction.
By following a consistent automatic sliding door installation checklist, installers can improve compliance outcomes, reduce project risks, and ensure every automatic door operates as intended from the moment it is handed over.
Whether you’re working on a retail entrance, healthcare facility, office building, or public-access project, investing time in proper installation and commissioning will always pay dividends in reliability, safety, and long-term performance.
Need Expert Automatic Door Solutions?
Digital Home Systems (DHS) supplies high-quality automatic sliding door solutions, safety sensors, access control integration products, and installer-focused technical support throughout Australia, New Zealand, and the Pacific region.
If you’re specifying, installing, or upgrading automatic sliding doors, contact DHS today for product recommendations, technical guidance, training opportunities, and access to industry-leading automation technologies designed specifically for professional installers.