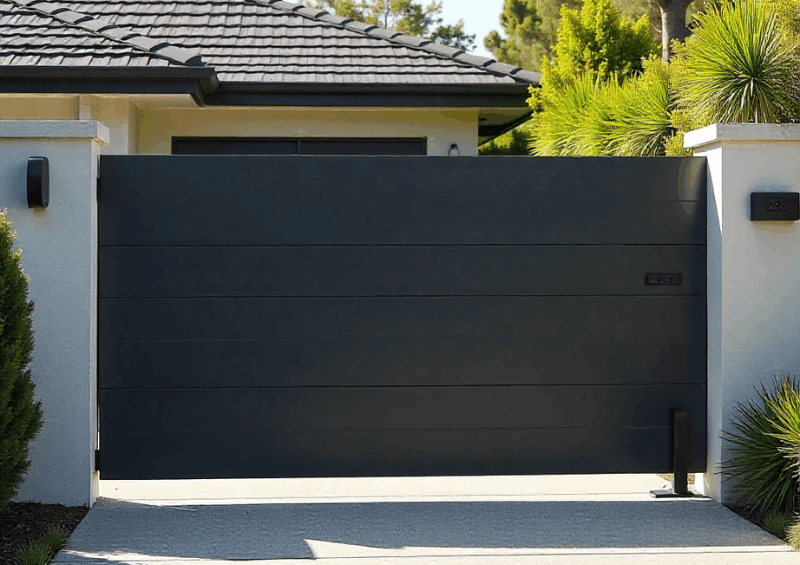
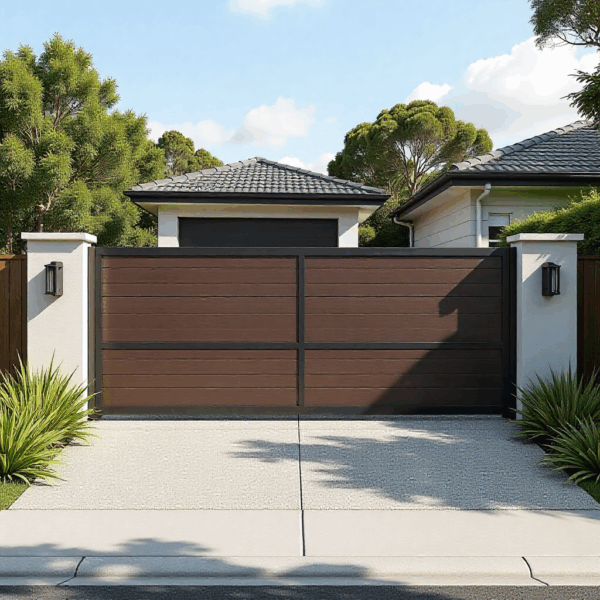
Swing gates are a popular choice for Australian homes due to their elegant look, space-efficient movement, and ability to integrate seamlessly with modern smart-home systems. As residential and commercial properties increasingly adopt automatic entry solutions, the demand for reliable Swing Gate Automation continues to grow.
Whether you are upgrading an existing manual swing gate or setting up a completely new automated system, proper installation is essential. Correct hinge alignment, motor placement, structural reinforcement, and wiring will determine the longevity and safety of your gate.
In this comprehensive 2000-word guide, we will walk you through everything you need to know about installing swing gate automation using top and bottom hinges — from pre-installation assessment to motor setup, safety integration, electrical considerations, and long-term maintenance.
Why Swing Gate Automation Matters
Swing Gate Automation enhances convenience, security, and property value. With a reliable automation system, you can open and close your gates using remotes, smartphone apps, keypads, intercoms, or even vehicle detection sensors.
Benefits of Swing Gate Automation
-
Improved security: Prevents unauthorized entry and enhances perimeter protection.
-
Convenience: No need to exit your car during rain or late hours.
-
Smart-home integration: Many systems integrate with automation hubs like Apple HomeKit, Google Home, and Z-Wave.
-
Smooth performance: High-quality top and bottom hinges enable stable gate movement under varying wind loads.
-
Increased property value: Automated gates are a premium feature appreciated by buyers.
Understanding these benefits helps ensure you approach the installation with confidence and clear project goals.
Pre-Installation Assessment (Before You Install the Motor)
Before installing any type of gate automation, a thorough site assessment is crucial. Proper evaluation ensures the automation system performs reliably and safely long-term.
Check Gate Structure and Materials
Your swing gate must be strong enough to support an automated system. Consider:
-
Gate weight and width relative to your chosen motor.
-
Material type: Steel, aluminium, wrought iron, or timber.
-
Gate frame alignment: Should not sag, bend, or twist.
-
Hinges: Check the condition of both the top and bottom hinges.
If the gate has excessive movement on the hinges, the motor will strain, leading to eventual failure. Reinforce or replace weak points before automation installation.
The Importance of Top & Bottom Hinges in Swing Gate Automation
The hinges are the backbone of a swing gate. They determine how smoothly your gate moves, how much motor torque is needed, and whether your automation system will last for years.
Why Top & Bottom Hinges Matter
Top and bottom hinges:
-
Maintain the gate’s vertical alignment
-
Support the full load of the gate
-
Control the swing arc
-
Prevent unwanted wobble or sagging
-
Reduce strain on the gate motor
Incorrect hinge alignment is one of the most common causes of motor failure in Swing Gate Automation systems.

Ensuring Proper Hinge Alignment
To verify proper alignment:
-
The vertical centreline between the top and bottom hinge should be perfectly straight.
-
Use a spirit level or digital laser level.
-
Ensure the gate does not scrape the ground at any point during the full swing arc.
-
Adjust hinge tension (for adjustable hinges).
If alignment is off, the gate will require more force, causing overheating or burnout of the motor.
Choosing the Right Motor for Swing Gate Automation
Different motors suit different property types and gate weights. Choosing the wrong system will reduce performance and lifespan.
Types of Swing Gate Motors
-
Linear Actuator (Ram) Motors
Best for residential gates; mounted between gate and post. -
Articulated Arm Motors
Suitable for wide or heavy gates; ideal when space around the hinge is limited. -
Underground Motors
Highly aesthetic; ideal for premium finishes and heavy gates. -
Hydraulic Swing Motors
Designed for demanding or commercial applications.
Motor Selection Considerations
Evaluate:
-
Gate weight
-
Gate width
-
Number of daily cycles
-
Environment (coastal, dusty, windy)
-
Power source: 240V AC, 24V DC, solar options
-
Safety features (obstruction detection, slow stop/start)
A precise selection guarantees optimal swing speed, torque, and longevity.
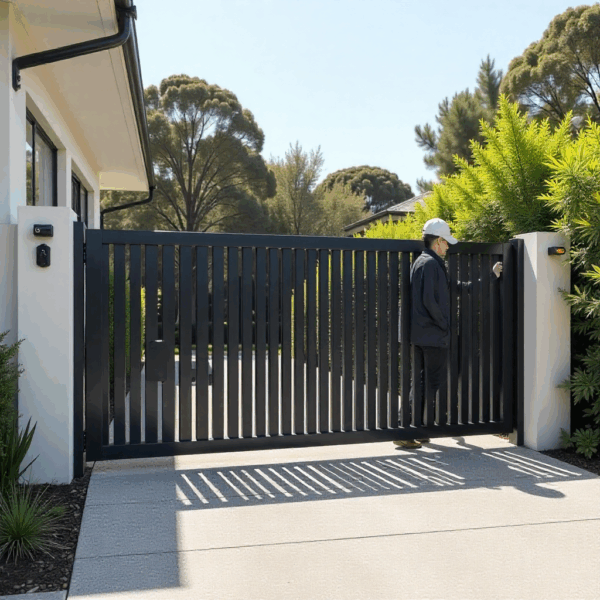
Step-by-Step Guide to Installing Swing Gate Automation
Below is a detailed overview of the installation process, focusing on systems using top and bottom hinges.
Step 1: Install or Reinforce Hinges
Before any motor is attached:
-
Inspect hinge welds or bolts for strength.
-
Align the gate vertically and horizontally.
-
Ensure the gate swings freely by hand.
-
Lubricate hinges to reduce future friction.
If you detect sagging or lateral movement, correct this first.
Step 2: Mark Motor Mounting Points
Each motor type comes with specific bracket positioning. General rules include:
-
Ensure the motor’s opening arc matches the gate’s intended arc.
-
Align brackets according to manufacturer measurements (often A-B dimensions).
-
Ensure the motor sits level and parallel to the gate frame.
Precision is crucial: even a 5 mm misalignment can cause noise or jerky movement.
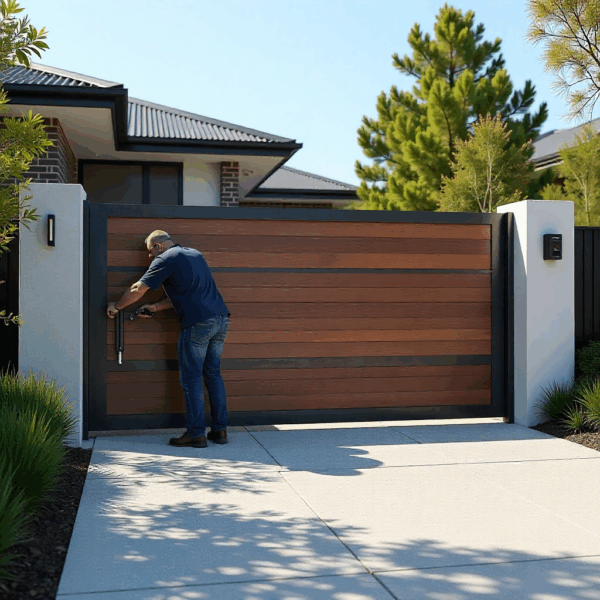
Step 3: Position the Motor Brackets
Using a welder or heavy-duty screws:
-
Attach the post bracket firmly to the gate post or pillar.
-
Attach the gate bracket to the gate frame.
-
Use metal backing plates if working with thin posts.
Double-check measurements before securing permanently.
Step 4: Install the Motor Arms
Attach the motor arms to the mounted brackets:
-
Verify that each arm has full range of movement.
-
Test opening and closing manually (with power off).
-
Ensure the motor does not bind, twist, or overextend.
Manual movement tests are essential before electrical wiring begins.
Step 5: Run Electrical Cabling
For Australian installations:
-
Use UV-rated conduit for outdoor wiring.
-
Ensure cabling complies with Australian electrical safety standards.
-
Keep wiring protected from flooding, pests, and accidental impact.
If unsure, consult a licensed electrician—especially for 240V motor systems.
Step 6: Connect Control Box and Set Limits
Once cabling is connected:
-
Mount the control box on a nearby wall or post.
-
Connect motor leads to their dedicated ports.
-
Set open and close limits using control board programs.
-
Adjust soft start/stop settings for smooth operation.
-
Test the obstruction detection sensitivity.
Limit-setting ensures the gate stops precisely where you want it.
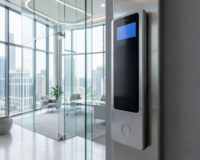
Step 7: Install Safety Accessories
For compliance and safe operation:
-
Photocell sensors
-
Flashing warning light
-
Emergency release key
-
Safety edges (optional but recommended)
Safety isn’t optional—many Australian councils require it.
Step 8: Final Testing
Perform multiple full open/close cycles:
-
Check swing speed
-
Check motor strain
-
Listen for unusual noise
-
Test manual release
-
Test remote range
-
Ensure child-safe operation
Once testing is complete, your Swing Gate Automation system is ready for use.
Installation Tips Specific to Top & Bottom Hinges
Top and bottom hinges require extra considerations compared to central pivot hinges.
Ensure Adequate Weight Distribution
Heavy gates often require:
-
Ball-bearing hinges
-
Adjustable tension hinges
-
Reinforced hinge plates
Lightweight hinges will fail prematurely under automation.
Check Vertical True Line
The gate must not lean forward or backward. If hinge posts are misaligned due to soil movement or age, install adjustable hinge receivers.
Add a Gate Stopper
A physical stopper protects your motor from absorbing all impact during closing. It should be mounted:
-
On the driveway surface, or
-
On the post (if design allows)
Wind Resistance Tips
Swing gates with large surface area suffer under heavy wind:
-
Use perforated materials
-
Tighten hinge tension
-
Increase motor torque settings
-
Add mechanical stoppers
Automation motors should never be the sole element resisting wind force.
Electrical & Legal Considerations in Australia
Electrical compliance is essential. According to Australian Government consumer and electrical safety guidelines, installers must follow national standards for wiring, safety devices, and electrical connections.
When installing 240V swing gate motors:
-
Only licensed electricians can connect mains power.
-
Control boards must be kept weatherproof (IP-rated).
-
Safety sensors and warning devices must be operational.
Always check local council rules if installing gates near public footpaths or driveways.
For detailed guidelines on gate safety sensors and compliance, you can refer to this resource: 👉 https://digitalhomesystems.com.au/gate-safety-sensors-standards/
Common Mistakes to Avoid in Swing Gate Automation
Avoid these frequent errors:
-
Installing motors before fixing hinge misalignment
-
Using underpowered motors for large gates
-
Ignoring wind load factors
-
Poor cable protection leading to water damage
-
Incorrect A-B motor measurements
-
Setting limits too tight
-
Skipping safety sensors
-
Forgetting to include a physical gate stop
Preventing these errors ensures long-term reliability.
Long-Term Maintenance Tips
After installation:
-
Lubricate hinges every 3–6 months
-
Tighten motor bracket bolts annually
-
Clean photocell sensors
-
Inspect wiring for animal damage
-
Test manual release regularly
-
Clean debris blocking the swing arc
Routine maintenance extends the life of both hinges and motors.

When to Call a Professional
DIY installation is possible, but you should hire a professional if:
-
Your gate is heavier than 300 kg
-
You require underground motors
-
Electrical wiring is complex
-
Your pillars are uneven or cracking
-
You need integration with security systems or intercoms
Professional installers help ensure compliance with Australian safety standards.
Conclusion
Installing Swing Gate Automation on top and bottom hinge systems requires careful planning, correct hardware selection, and precise alignment. When done properly, you will enjoy a smooth, quiet, secure, and long-lasting automated gate system that elevates your property’s convenience and safety.
By following the detailed steps in this guide—while paying close attention to hinge alignment, motor placement, and electrical safety—you can set up a reliable system that performs flawlessly for years.
Upgrade your property with a reliable, high-performance Swing Gate Automation motor built for durability and smooth operation.