Commercial property owners across Melbourne are increasingly investing in automatic gate systems. From warehouses in Dandenong to logistics hubs in Laverton North, the demand for secure, efficient, and professional access control has never been higher.
For installers and automation companies, this shift represents both an opportunity and a challenge. Clients expect not only functional gates but also systems that are safe, compliant with Australian standards, and seamlessly integrated with their wider security infrastructure.
This guide will walk you through how to install commercial automatic gate system solutions, focusing on the practical aspects of planning, installation, compliance, and maintenance. You’ll also find a detailed sliding gate installation guide, insights into common problems, and strategies to build ongoing revenue streams as one of the leading automatic gate installers Australia.
Table of Contents
ToggleWhy Businesses Are Choosing Automatic Gates
Enhanced Security
Commercial properties often store high-value assets. Automatic gates provide the first barrier against theft, trespassing, or unauthorized entry. When paired with CCTV and access control, they form a strong layered defense.
Traffic Flow and Efficiency
Sliding gates allow smoother movement of heavy trucks and delivery vans. Automated entry reduces bottlenecks during shift changes or peak hours.
Professional Image
First impressions matter. A modern, motorized gate gives offices, showrooms, and business parks a polished, professional appearance.
Compliance and Safety
In Victoria, regulations from WorkSafe and standards like AS 4024 (Safety of Machinery) require employers to minimize risks from moving gates and machinery. Automatic gates designed and installed correctly help businesses meet these obligations.
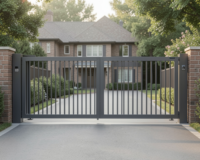
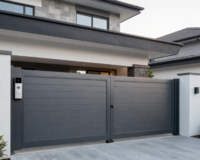
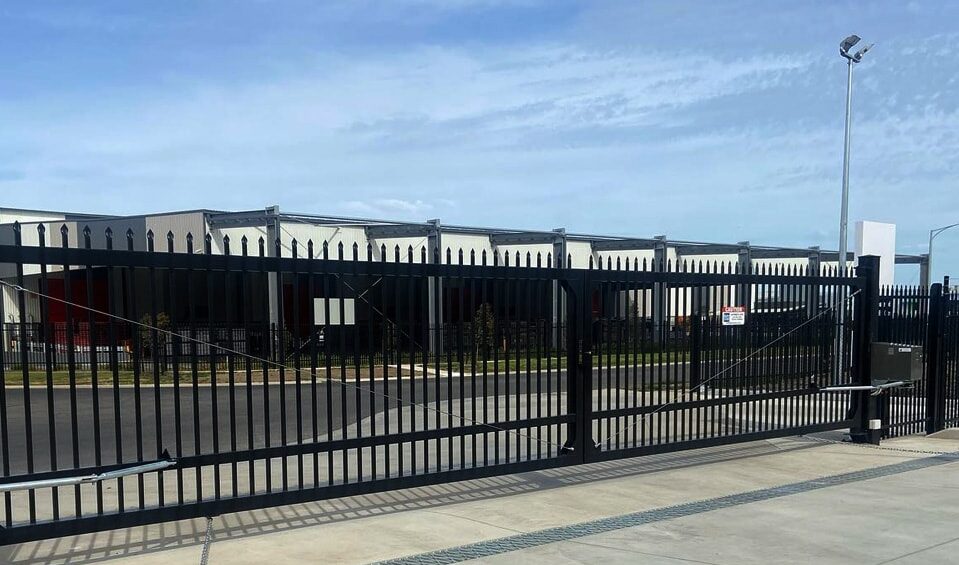
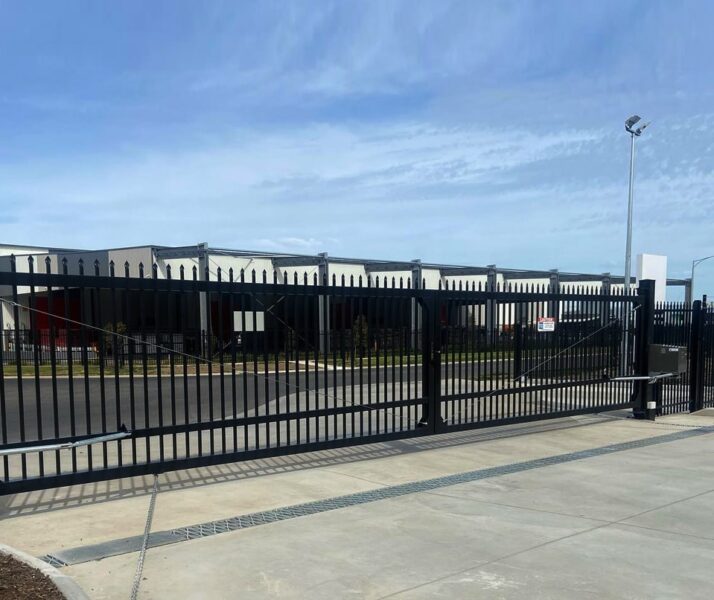
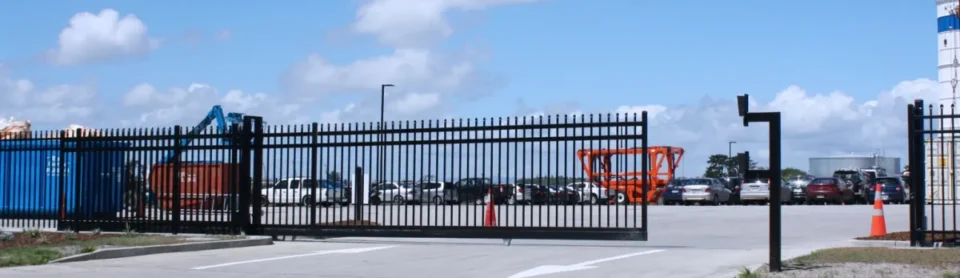
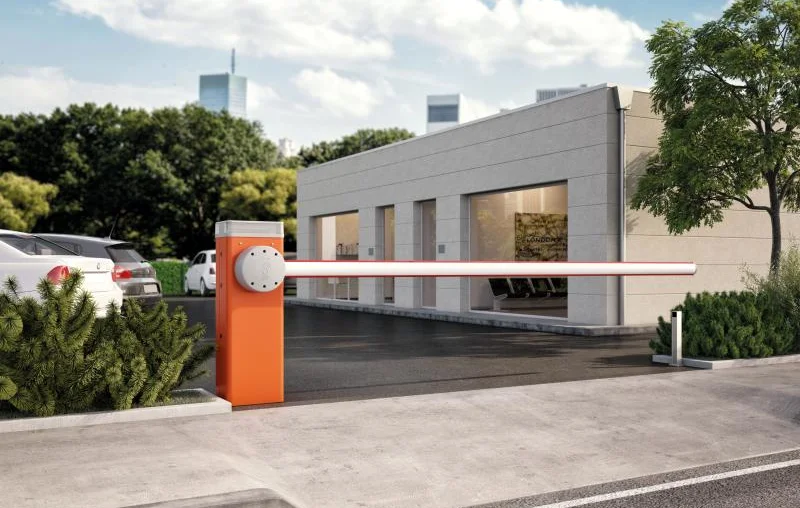
Types of Automatic Gates for Commercial Properties
Sliding Gates
-
Ideal for large openings up to 15 metres.
-
Suitable for industrial estates, transport depots, and warehouses.
-
Require less clearance space compared to swing gates.
-
Can handle heavy-duty cycles, making them Melbourne’s most popular choice.
Swing Gates
-
Aesthetic appeal for heritage or office properties.
-
Require clearance for the gate leaf to swing.
-
More vulnerable to strong winds, common in Melbourne’s western suburbs.
Boom Barriers
-
Perfect for car parks and quick vehicle access points.
-
High-speed operation (2–4 seconds).
-
Not a standalone security solution—best used with fencing or bollards.
Read more: 5 Benefits of Installing Automatic Boom Gates in Commercial Properties
How Should Installers Conduct a Site Survey Before Installation?
A thorough site survey is the foundation of every successful project.
Questions to Discuss with Clients
-
How many cycles per day are expected?
-
What types of vehicles will use the gate?
-
What access control methods are required (remotes, RFID, ANPR, intercom)?
-
What should the gate do during a power outage?
Site Considerations in Melbourne
-
Soil and drainage: Many industrial zones have clay soils that require reinforced footings and agi-pipes for drainage.
-
Ground slope: Sliding gates require a level surface. Sloped driveways may need cantilever designs.
-
Corrosion: Properties near Port Phillip Bay should use galvanised or aluminium frames.
-
Power supply: Ensure an isolated circuit is available, or budget for trenching new conduits.
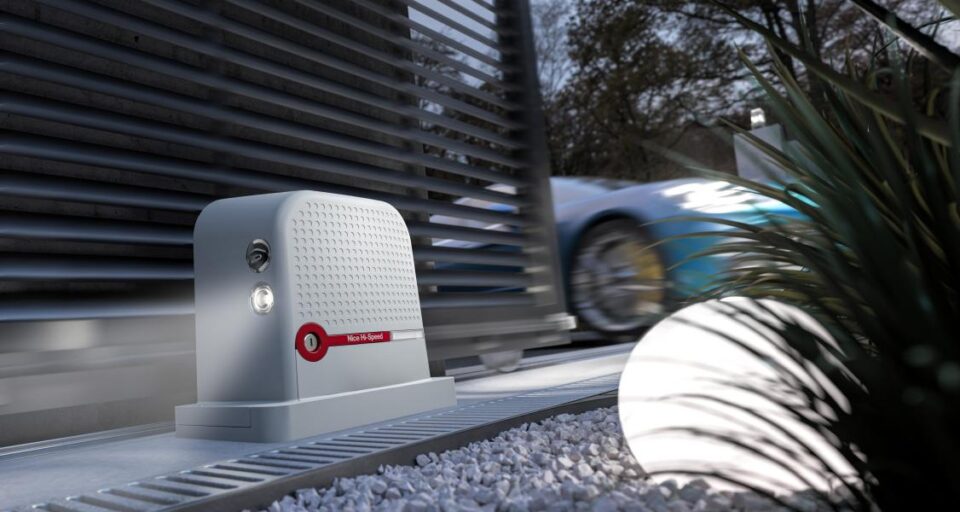
How Do You Choose the Right Motor and Hardware?
A thorough site survey is the foundation of every successful project.
Questions to Discuss with Clients
-
How many cycles per day are expected?
-
What types of vehicles will use the gate?
-
What access control methods are required (remotes, RFID, ANPR, intercom)?
-
What should the gate do during a power outage?
Site Considerations in Melbourne
-
Soil and drainage: Many industrial zones have clay soils that require reinforced footings and agi-pipes for drainage.
-
Ground slope: Sliding gates require a level surface. Sloped driveways may need cantilever designs.
-
Corrosion: Properties near Port Phillip Bay should use galvanised or aluminium frames.
-
Power supply: Ensure an isolated circuit is available, or budget for trenching new conduits.
Read more: Explore New NICE Robus Motors for Sliding Gates | Full Specs & Kit Guide
Sliding Gate Installation Guide: What Are the Step-by-Step Instructions?
This section is your hands-on sliding gate installation guide. Adjust steps to your preferred method statement.
Step 1: Set out and civil works
-
Mark alignment with stringline/laser across the opening and fence line.
-
Excavate footing for track or cantilever base; include conduits (power, low-voltage, loops).
-
Drainage: Lay agi-pipe or graded fall so water won’t sit under the track.
-
Concrete: Pour reinforced footing and plinth pad for the motor; set anchor bolts true and level.
Step 2: Track or cantilever hardware
-
Tracked sliding:
-
Bed the track straight and level (check every metre).
-
Allow expansion gaps per manufacturer.
-
-
Cantilever:
-
Install base rollers to spec; ensure free travel without twist.
-
Step 3: Gate frame and rolling gear
-
Fit wheels/rollers to the gate leaf; check bearings are pre-greased.
-
Place the leaf on track; confirm smooth travel, no high spots.
-
Install guide post with top/bottom rollers to keep leaf vertical.
Step 4: Motor placement and rack alignment
-
Position the motor on plinth with gear facing rack line.
-
Tack mount the rack to the leaf in sections, maintaining constant gear mesh.
-
Leave a small backlash (credit card clearance) to prevent binding.
-
Fit limit magnets/flags or set encoder positions for open/close ends.
Step 5: Electrical wiring and controls
-
Mount the control board (often within motor housing).
-
Run mains via isolator; terminate earths properly.
-
Pull low-voltage cables for photo-eyes, keypad, intercom, access reader.
-
Keep LV and mains in separate conduits to reduce interference and meet wiring rules.
-
Label every core and document in the panel door.
Step 6: Safety devices
-
Photo-eyes each side of the opening at bumper height; align and test.
-
Additional beams mid-span for long gates or public footpaths.
-
Flashing light/sounder if site risk warrants it.
-
Emergency stop or obvious manual release with instructions.
Step 7: Access control integration
-
Remotes: Enrol and test range.
-
Keypad/RFID: Terminate Wiegand/OSDP; configure door groups/schedules.
-
ANPR: Set open pulse on plate match; consider tailgating logic.
-
Intercom: SIP or 2-wire—test audio/video and door release.
-
Partial open for pedestrians/cyclists if needed.
Step 8: Programming and tuning
-
Set soft start/stop, ramp times, and torque.
-
Program auto-close with beam supervision; avoid auto-close if sightlines are poor.
-
Configure obstruction sensitivity and reversal.
-
Test battery backup/UPS and fail-safe behaviour.
Step 9: Final mechanical checks
-
Tighten all fasteners to torque.
-
Confirm end stops are robust; catcher holds leaf without bounce.
-
Check clearances along full travel (no binding at temperature extremes).
Step 10: Clean-up and line marking
-
Remove grinding debris, swarf, and concrete splatter.
-
Apply vehicle line marking if traffic paths were modified.
-
Photograph the installation for your project file and asset register.
Electrical, networking, and safety integration
Wiring best practices (commercial)
-
Dedicated circuit with RCD/RCBO as required; labelled isolator within sight of the motor.
-
Surge protection / lightning arrestor especially on exposed perimeters.
-
Earth bonding of metallic parts; verify continuity.
-
Separate conduits for mains and ELV; maintain bend radius for network cables.
Network & cloud
-
If the system is IP-enabled, reserve VLANs for security devices.
-
Lock down default credentials; apply firmware updates.
-
Log events to the site’s VMS/ACS or cloud dashboard for service analytics.
Safety risk assessment (installer mindset)
-
Identify crush, shear, draw-in zones; mitigate with photo-eyes, safe speeds, guards, and signage.
-
Consider public interface: footpaths, cyclists, children.
-
Plan safe manual release and emergency procedures; train the client.
Compliance & documentation in Australia (installer perspective)
This is guidance, not legal advice—confirm local requirements before work.
Installers must comply with:
-
AS 4024 – Safety of Machinery to minimize entrapment risks.
-
AS/NZS 3000 – Wiring Rules for all electrical works.
-
AS 60839 – Access Control Standards if integrated with building security.
-
Powered doors/gates: Apply safety-of-machinery principles (risk assessment, guarding, safety devices, instructions).
-
Licensing: Electrical licences and, where applicable, security equipment registration.
-
Records: Keep test sheets, torque logs, device serials, firmware versions, user training sign-off.
Always provide a handover pack including risk assessments, wiring diagrams, and maintenance schedules. This protects you legally and reassures clients.
Handover pack (what your Melbourne clients appreciate):
-
As-built drawings and cable schedules.
-
Control board configuration export/screenshots.
-
Safety risk assessment + maintenance schedule.
-
Warranty statement and service contact.
-
Keys, remotes, access tokens, and manual release procedure.
Testing, commissioning, and client handover
Commissioning tests (tick every box)
-
Functional: Open/close, partial open, auto-close, remote/reader/intercom, ANPR triggers.
-
Safety: Beam block, obstruction reversal, emergency stop, manual release.
-
Electrical: Voltage at load, insulation resistance (as applicable), earth continuity, surge device present.
-
Environmental: Operation in wind; confirm drains are clear and track is clean.
-
Network: Device discovery, time sync, event logging, user provisioning.
Client training (short, practical, memorable)
-
Daily checks: debris on track, unusual noises.
-
Manual release and re-engagement steps.
-
Who to call for faults; what information to provide (error lights, beeps, photos).
-
Don’t bypass photo-eyes or safety edges—ever.
Preventive maintenance & service contracts
Commercial gates earn their keep when they’re boringly reliable. That’s your recurring revenue.
Monthly (client)
-
Brush debris from track; visual check for damage.
-
Confirm photo-eyes are clean and aligned.
Quarterly (installer)
-
Inspect rack/pinion wear, guide rollers, end stops.
-
Check fixings and torque; lubricate bearings (as specified).
-
Test obstruction reversal and all safety devices.
-
Verify battery/UPS health; run at least one power-fail cycle.
-
Update firmware only from trusted sources; re-test.
Annually
-
Revalidate risk assessment if site usage changed (more traffic, different vehicles).
-
Replace consumables (rollers/nylon rack segments) as indicated by wear.
Offer tiered service plans (Bronze/Silver/Gold) with response SLAs, loaner controllers, and discounted parts to stand out among automatic gate installers Australia-wide.
Troubleshooting: quick wins for common faults
-
Gate won’t move: Check isolator on, breaker not tripped, e-stop released, motor clutch engaged, limits not overrun.
-
Stops mid-travel: Obstruction setting too sensitive, rack binding, weak battery on DC systems.
-
Won’t auto-close: Photo-eye blocked/misaligned; auto-close disabled in config.
-
Remote range is poor: Relocate antenna, check for RF interference, re-learn remotes.
-
Chattering or grinding: Rack height inconsistent; pinion preload too tight; worn roller bearings.
-
Intermittent after rain: Water in conduits/junctions—re-terminate with gel joins; improve drainage.
-
ANPR misses: Poor camera angle/IR reflection; refine whitelist/thresholds; ensure clean plates and correct trigger distance.
Pricing, scope control, and client expectation management
Scope pillars to define in your proposal:
-
Civil works (who pours concrete, who reinstates asphalt/line markings).
-
Electrical (dedicated circuit provision by customer vs. you).
-
Access control (you integrate to existing, or you supply new).
-
Network (client’s IT to provide VLAN/ports, or you provide a 4G edge).
-
After-hours/traffic management costs if driveway closures are needed.
Cost drivers (to communicate upfront):
-
Gate weight/width, cantilever vs tracked, corrosion protection.
-
Number of safety devices and access points.
-
Battery backup/UPS, surge protection, ANPR/intercom integrations.
-
Distance to switchboard and trenching complexity.
Transparent scoping keeps your margins healthy and makes you the trusted automatic gate installer in Melbourne.
How Much Does It Cost to Install a Commercial Automatic Gate?
Prices vary, but here’s a rough Melbourne guide:
-
Basic sliding gate: $10,000–$15,000
-
Industrial heavy-duty gate: $15,000–$25,000+
-
Extras:
-
Loop detectors: $500–$1,500
-
Intercom/ANPR: $2,000–$5,000
-
Maintenance contract: $500–$1,000/year
-
Key installer tip: Always explain cost drivers upfront (gate size, motor strength, civil works).
Why Should Installers Offer Maintenance Contracts?
What’s in It for Clients?
-
Peace of mind that the gate won’t fail during peak hours.
-
Compliance with workplace safety inspections.
-
Lower total cost of ownership.
What’s in It for Installers?
-
Recurring revenue streams.
-
Long-term client loyalty.
-
Early fault detection = fewer emergency callouts.
FAQs
How long does it take to install a commercial sliding gate?
Typically 3–5 working days including footings, cure time, mechanical install, wiring, and commissioning—complex integrations can add time.
Can I retrofit a motor to an existing manual gate?
Yes—check frame rigidity, track condition, straightness, and structural posts. You may need to re-rack and replace rollers.
What motor size do I need?
Match motor rating to gate mass + duty cycle. For most commercial Melbourne sites, medium-heavy motors (≈600–1200 kg rating) are common; go higher for wind-solid infills or very wide spans.
What happens in a power outage?
Options include manual release, battery backup (24V DC systems), or a UPS. Agree the fail mode with your client (fail-secure vs. open).
Do I need photo-eyes if the gate has obstacle detection?
Yes. Use redundant safety: beams, safe speeds, and obstruction reversal. Never rely on motor current sensing alone.
What maintenance is required?
Quarterly professional service plus client housekeeping (keep tracks clean, report unusual noises). This extends motor life and keeps the warranty valid.
Conclusion: Why Should You Position Yourself as a Specialist Installer?
In Melbourne’s competitive market, clients are looking for automatic gate installers Australia who don’t just “fit motors,” but deliver safe, compliant, and efficient systems that integrate with their wider security.
By following this sliding gate installation guide, you’ll be able to:
-
Accurately assess sites
-
Choose the right hardware
-
Comply with Australian standards
-
Deliver smooth, reliable installations
-
Build long-term service contracts
That’s how you stand out, win tenders, and become the go-to commercial gate automation expert in Melbourne.